


Going Barefoot: Concerns & Benefits
It has become abnormal to be seen barefoot in public. I have heard the same comments over and over when going barefoot in the store,
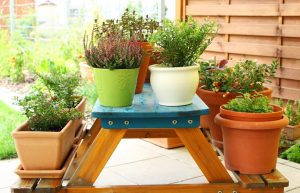
How to Choose the Best Pot for Your Container Garden
Container Gardening It’s an amazing dream. Having your own garden where you grow fruits, vegetables, and flowers. But a garden needs a lot of space,
Intermittent Fasting is a Natural Remedy
The most common type of fasting is known as intermittent fasting. Intermittent fasting, also known as cyclic fasting, is a catch-all phrase for eating and
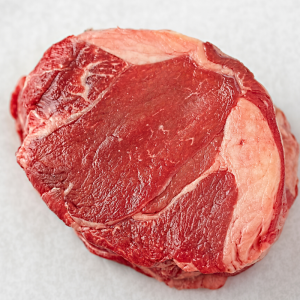
World Carnivore Month 2020 Healthy Start Challenge
As 2019 comes to a close, many people have their New Years Resolutions lined up for 2020. As usual, health and strength are at the
Self Sufficient Backyard Gardens are the Way of Life in Northern Italy!
My Tour of Backyard Gardens in Italy I was delighted to arrive in Northwest Italy and discover that backyard gardens were in nearly every home.

VIDEO – Survival Gardening In The Heat with Marjory Wildcraft
From Marjory Wildcraft’s GrowYourOwnGroceries.org Growing food in your backyard when its over 100 degrees for more than three months? How do you do that? If

Boeing 727 Converted in to Luxurious Home and Tropical Retreat
Check out this amazing Boeing 727 home conversion! Yes, people convert airplanes in to homes! The home is owned and operated by Hotel Costa Verde

Combat Seasonal Allergies with DIY Lymphatic Drainage Massage
It’s only January and almost everyone in Austin is suffering from Cedar allergies! A few nights ago I met with some natural health friends at Brave

Rise of the Survival Garden: How to Grow Food During COVID Quarantine
One seriously unintended result of Coronavirus and all this Covid-19 drama is the worldwide boom of survival gardening, likely inspired by the Victory Garden boom

Avoid These Four Sources of Heavy Metals and Improve Your Health Today
Heavy metals bring many toxins into our lives. To eliminate them you must be aware of these 4 sources. With the number of people going

How to Enjoy Fresh Flavors Year Round + 5 Easy Indoor Herbs
Your indoor herb garden will be convenient, fragrant, and pest-free. They require little maintenance and are simple to start! Fresh herbs have been used for

This Tiny House was 3D Printed in Under 24 Hours for Less than $10,000
BY: SHAWNTAE HARRIS 3D Printed Tiny House – Home Building of the Future While the horrific taunt of bills, student debt, and high rent plague